Viber bot for the administrator
What purposes the bot has been designed for
It is essential for many of our clients to have access to the basic system functions while they are away from computers and only have smartphones on them. For this purpose, we have developed the Viber bot which allows viewing and managing orders by means of mobile phones. Using it is easier and much more convenient than performing the same operations on the computer, tablet or any other devices. As the installation is complete, the bot does not require authorization: users sign in with the help of a secret key that they receive automatically.
What does Viber bot enable you to do
- Look through customers’ orders
- Do the search through the orders
- Change order status to “paid”
- Change order status to “deleted”
- Resend orders to clients
- Forward orders to yourself in case you need to send it on to someone else or to download the tickets
- View the list of buyers
- Edit customers’ emails in case they entered information incorrectly, so their tickets should be resent
- View basic sales statistics
- Receive error notifications (e.g. order payment failures or other faults included in the error-log)
- Receive order notifications. The two latter functions can be switched off and managed in the user editing form.
Is it possible to add more functions to the bot?
In our view, the present version of Viber bot includes all essential functions, however, we are ready to make allowance for our clients’ opinion and to extend the bot’s functionality in the future. The first release is an invitation to the dialog.
Who can use the bot
Those users who have the status of the main administrator or partner have access to the bot. The main administrator is in full control, while partners, logically, can only view orders relating to themselves and cannot edit customers’ emails.
How to start operating Viber bot
It is a precondition to have Viber account. In case you have it, get authorized in the Viber Admin Panel and create a new bot. For this purpose, you need to click on “Create bot account” and fill in the following form:
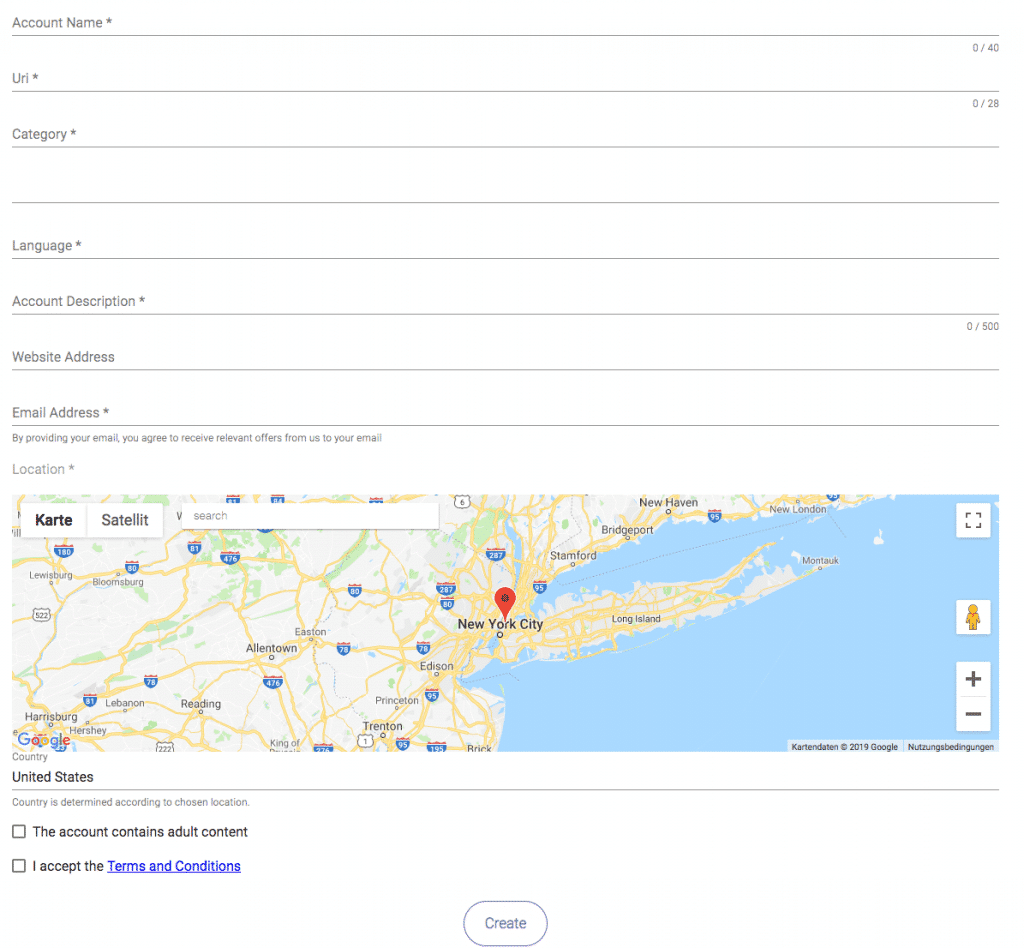
Mind that the URI field should contain a free string, not your site address. For example, if your website address is best-event.com, you may enter besteventscom in the URI field. The company address should be identified by dragging the red sign across the map. Other fields do not require a detailed explanation. Having completed the form, you will get a key (Token) which needs to be pasted in the system settings for bot activation.

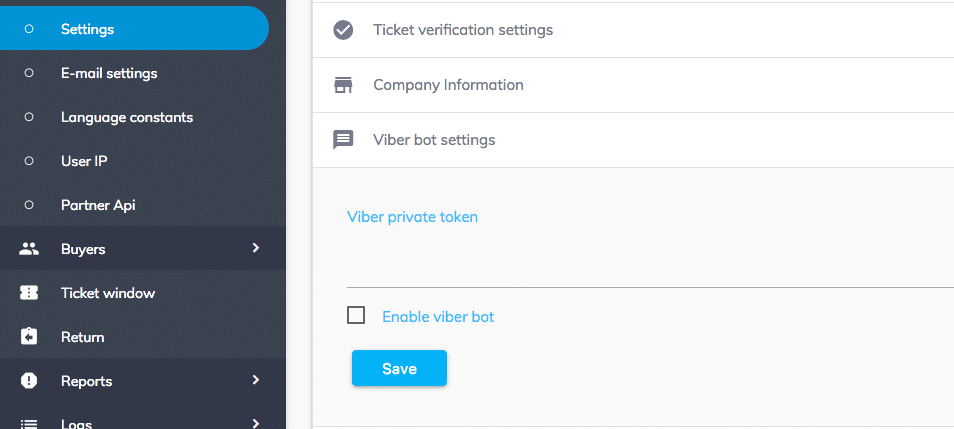
At the very bottom of the “General settings” page find the “Viber bot settings” inlet: enter the key and activate the bot.
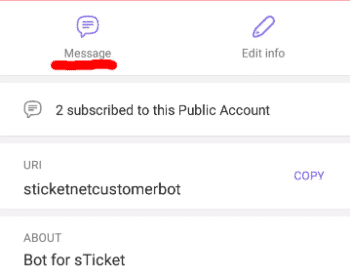
The bot will be ready for the receipt of the commands immediately after you have entered the key and completed the activation. The “Message” icon will appear on the mobile screen of the soft owner – in the bot editing form. By clicking on the icon, you can give your first command to the bot. In order to add the Viber bot to the smartphone, you can also use the following method: through the form for adding contacts, scan the code in the bot editing form. It enables you to “Share” the bot as if it were a contact.
No matter the contents, the bot will respond to the first received message with a user authorization request. The validity check is carried out by associating the Viber bot owner and the system user. Roughly speaking, the bot user ought to be “bound” to the system user.
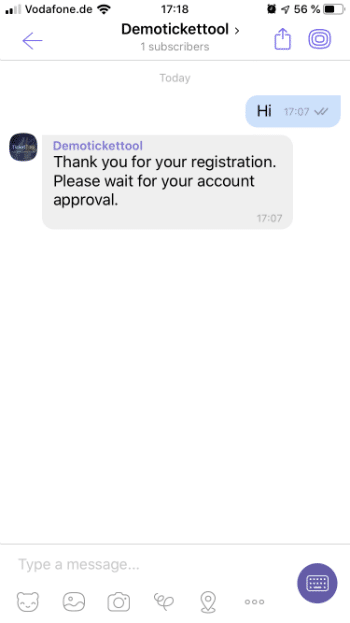
As any bot user sends the first message, a new inlet will appear in the menu. It will include the list of users who want to join the bot operation. You can find this item at the very bottom of the menu: “New Viber requests”.

On this page, you can see all user inquiries. To confirm a request, find it on the list and press the message icon. In case you want to decline it, click on the red button. When you accept an inquiry, the user receives a message affirming successful registration, so he or she can start using the bot.
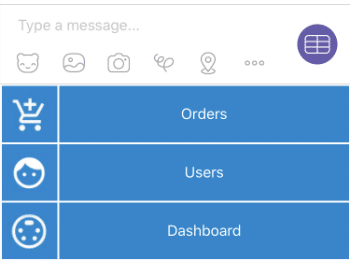
This is how the main menu of Viber bot looks like:
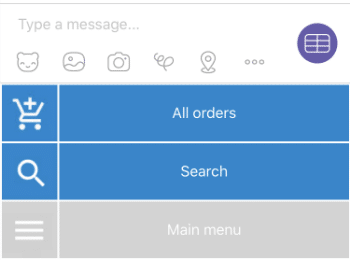
Below is the on-view and search menu:
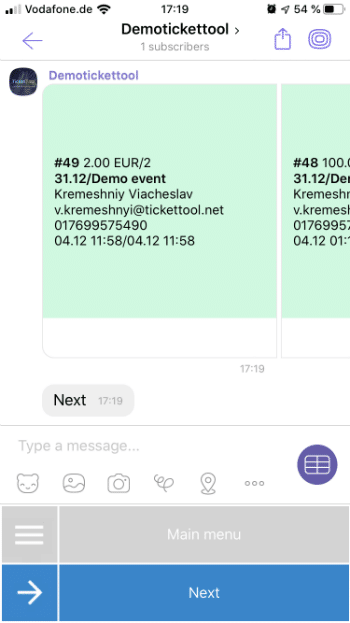
Having found the required order, press on it to carry out relevant actions:
Below you will find the screen samples of the order management menu:
#1 Managing a “Paid” order

#2 Managing a “Booked” order
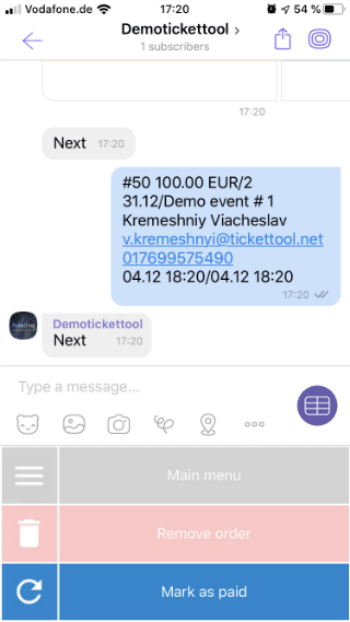
By pressing on the icon that represents user info, you can edit the client’s email address.
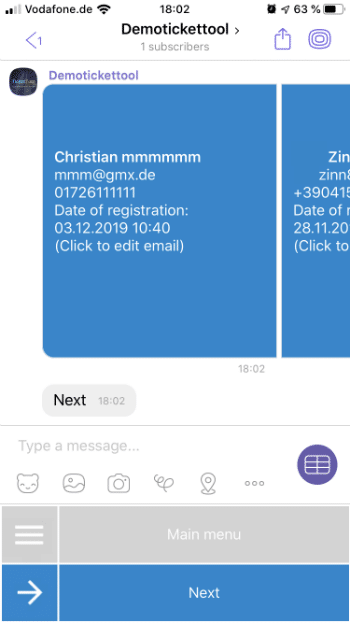
The list of customers looks the following way:
Many users wonder why we decided to develop our bot on the platform of Viber messenger and didn’t opt for other popular applications. The reason is that WhatsApp allows access for bot development only to major companies. As for Facebook, its messenger is extremely difficult to set up. We were out of concern for some of our clients may struggle to use this bot due to its complexity.
If you have more question, please call us:
Or drop us an E-mail: